Our Future Library/Sunporch

Wednesday, July 25, 2012

I'm itching to start a project. Oh what I would give to work on something and spend a few days completing a room. It would be so nice to work on something else around here!

But, alas, summer is just so busy that things have been at a standstill. The carpenter and I have been completing little things here and there, but its nothing to write home on the blog about. Maybe once we have accumulated enough small projects, I will write a huge post dedicated to them. But, that would also require that I be able to upload pictures to blogger. Does anyone know how I can have unlimited space for pictures? Apparently I have used up all of my space this month and can only pull pictures from the internet or ones that I have already used on the blog. I don't know how to fix that. I'm completely computer illiterate when it comes to certain things! 

Anyways, once things settle down a bit, and we aren't traveling allover Timbuktu, I would like to start on a much anticipated project: our sunroom/porch/reading room. 


The above is what it looked like when we first toured the house. Then it became filled with boxes and was used as a storage space for all of our stuff. It was like an episode of hoarders. 


Now, it is filled with boxes of books, our big dog pen, a queen mattress set, and a few other odds and ends. Here are the most recent pictures that I have access to. Things have changed a bit, but you get the idea. 


One thing has led to another and we feel like this space is the next one we will tackle. Thanks to some generous family members (thanks mom and dad!!) we have been given enough stuff that we can finish this project for minimal money. But more on that in another post. First, let's chat about design, shall we? 

I have been working towards this idea that our entire downstairs should have one color scheme. Every room opens into the next one and I want them all to go together. So far we have a gray, grellow, off white, and light aqua color pallet. 


These swatches don't do justice to the colors, but can you see how they all go together?

We have the french white in the living room, marina gray in the kitchen and bathroom, and the pistachio is in the dining room. So when it came to picking a color for the sunroom, I thought it made a lot of sense to pull in some Palladian Blue. I arrived at this color choice after deciding that it would be perfect to reference our living room rug in another part of the house.


After the color was decided upon, we moved on to the purpose of the sunporch. Jonathan and I talked about how we would like the room to function and what purpose it would serve. We concluded that we needed a place to store books and this would be the ideal location. I didn't really want to clutter up our living room with tons of books (plus, where would we put bookcases?!) and I liked the idea of having a room dedicated to our stash. I have always wanted a library--and this will be pretty darn close to it!

I also liked the idea of having plenty of seating. The seating had to be comfortable and practical at the same time. As our house has limited space, every single room must have dual functions. Thus, our sunporch/library will also function as a guestroom if we need it to!

You may be wondering how.

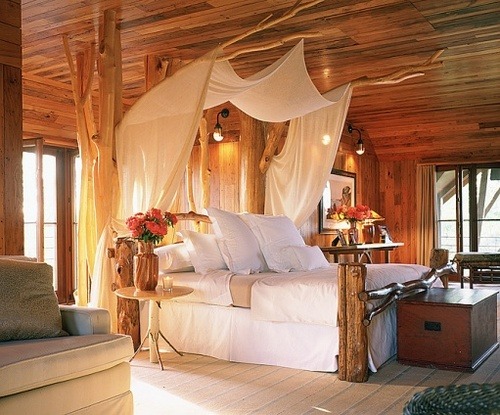
Well, in this post, I alluded (not so discretely)  to the fact that we were thinking of creating a pallet bed! I love this idea. It could be a cozy place to curl up with a good book or, when needed, could be the perfect place for a guest to crash. Something similar to this, but without the headboard.


So our room will have lots of bookshelves, a fun pallet bed, and there may be a few other things that I have planned. But you get the overall idea, don't you? 

I will be back Friday with more about our next project and hopefully we will get working on it soon!! 

Happy Hump Day all! 

Bring on the Cold Weather!

Monday, July 23, 2012

I am in the mood for fall and winter.

Yes, I'm completely finished with this thing call summer. 

Yes, I'm fully aware that it isn't even August yet. 

Yes, I'm definitely in trouble.

So, I turned to Pinterest for a bit of excitement and fall/winter inspiration. Plus, since I still am having issues uploading pictures to blogger, I figured you might all appreciate some pretty inspiration as well.

Bring on the pins!!


I'm really looking forward to the coming seasons! What about you? Which season is your favorite?

*P.S. I was having horrible luck on Pinterest and couldn't find any of the original sources other than the ones marked. Sorry!*

Monday: Pinterest Love

Monday, July 16, 2012

Good morning all!

I'm going to be sharing some of my favorite Pinspiration today. Unfortunately I am having issues uploading pictures, so instead of skipping a post, I'm just going to use the internet's pictures for the time being! 

Bring on the beauty!


Don't you just love the little birdies? I'm thinking this is a great way to use up my fabric and felt scraps! 

Source: tinywhitedaisies.tumblr.com via Elizabeth on Pinterest

- - - - - - - - - - - - - -

I also really like the idea of making my own cloth napkins. I love that these include rickrack. They would be so easy to make!


- - - - - - - - - - - - - - 


I have been dreaming of an entryway. Simple and pretty. 


- - - - - - - - - - - - - - - -

Palledian blue? Yes please. Guestroom? Yes please!!


- - - - - - - - - - - - -

I have also been thinking about our sunporch and the need to make it a functional area. I think a pallet bed would be perfect!


I just love the ideas I see on Pinterest. :)

Book Review: The Fourth Fisherman

Saturday, July 14, 2012

A few weeks ago I was reading someone's blog and stumbled upon this website. They basically send you books to review on your personal blog!

Free books?

I'm in!

Well the first book that they sent me was entitled The Fourth Fisherman by Joe Kissack.


This is an epic story of survival, revival, and faith. Joe Kissack is a man on top of the world, when his addiction to prescription painkillers threatens to ruin everything. The book entwines his story with that of three fisherman who survive a 9 month ordeal of being lost a sea.

At first this book started off a bit slow. I was two chapters in before I became hooked. Joe writes this story very well and after you get past that foundation that the opening chapters build, you reach a tale that leaves you wanting to know "what happens next." Each chapter alternates between the story of the fisherman and Joe's story. One is physical survival story--battling weather, hunger pains, and dehydration. Where as Joe's story is one of surviving our emotional battles--depression, feelings of insignificance, and addiction.

As the fisherman battle to survive, you hear about their strong reliance on God via the small pocket Bible that one of the men just happens to have brought with him. In a situation that seems completely hopeless, three of the original five fisherman, survive due to their continuous hope that God will provide. They find a way to store rain water and drink sea turtle blood for hydration and are able to capture various other sea creatures for sustenance. Surviving in a boat, similar to the picture below, for nine months at sea, is definitely a miracle of God.


Meanwhile, Kissack is fighting his own battle. A prominent man in the television industry, Kissack was responsible to license the rights of television programs to broadcast stations around the country. But, this job and a poor relationship with his father left him missing something. He was always craving something and would often turn to alcohol and eventually prescription medications to fill the void. As the story progresses (you will just have to read the book to find out how it happens), Kissack drops to an ultimate low where he finds the love of Christ.

As he continues through his own healing, he hears about the story of the three fisherman and decides  that God is calling him to share their story. Thousands of dollars later and a crazy trip through the jungles of Mexico, Kissack touches base with someone close to the fisherman and works out a deal to share their story--this book.

The Fourth Fisherman is an easy read and definitely inspirational to say the least. I would recommend it to someone looking for a good and fast read.  I would give this book 4 out of 5 stars.

The Stairway to Haven--Stage One

Thursday, July 12, 2012

Now, here is a project that has been slowly coming together. It all started back when we moved into the house. Upon first glance, our stairs were like everyone's...just plain-jane stairs. Definitely nothing special. I knew that I wanted to do something to them, but wanted to wait until we were predominately done with the upstairs.

No need to make them look pretty only to have carpenter boots destroy them again :)

Once that was done, it was time to tackle those dang stairs. They were making a horrible first impression of our haven above. Instead of welcoming us to a relaxing night of sleep, they were saying, "Let's go to the creepy attic." or "Let's climb up the garage stairs to the scary loft." They were everything but impressive. 

At this point you may be asking yourself why I'm writing a post about stairs. Well, in my opinion, they are important. As I said, they are the first impression of our second story. I believe that no space in a home is insignificant. If you create beauty around you, you will feel beautiful and enjoy the space you live in so much more. The stairs did not make me feel beautiful nor enjoy our little space.

Um I have to say that I never thought I would be associating stairs with my feeling beautiful.

I have officially joined the crazy train.

An all new low for me.

My parents would be so proud.

And moving on...

Here are a few "before" pictures of what the stairs used to look like.


Can you see the horrible stair treads? They were rubber...really meant for stairs that are outside or are leading outside. Definitely not meant for a romantic first impression, inside. Practical for an older lady who needs to be careful, but so not attractive.

Have I made my point clear?? 

They were U-G-L-Y and had no alibi reason to be. 

So, we got to work. Well, for this first stage, I got to work. Yay for something that I can contribute to! Just call me a carpenter in training--well maybe a professional painter in training?--yea I got nothin'. 

Either way, my paint brush and some leftover paint were put to good use a few weeks ago. First I primed and painted the risers and stringers--the vertical pieces on the stairs. Here is a picture that outlines the technical terms that I'm referring to. 
(source)

This took me one whole day to accomplish. I would paint a coat, block off the stairs and let it sit for a couple of hours, then paint another coat. 


Don't you love how I blocked off the stairs? I don't have a doggy gate and I had to keep the little puppers away from the stairs. She was way too inquisitive for her own good, hence the pile-o-junk. 

Once all three coats were done, I was getting really excited to see what the end result would be. Look at the fresh coat of white on the risers and stringers. It is such a transformation already!


The next day, I grabbed the rest of the paint from the previous day and primed and painted the treads. Oh! I almost forgot! It it isn't already obvious, we removed the rubber treads that were on the stairs when we purchased the house. You may have noticed that in the pictures above. When I began painting, I was just working with the actual wood treads themselves. :)

Oh and another thing...we decided to paint the stairs white because it was the most neutral thing to do. I went back and forth between doing brown or red on the treads (brown matching the floor in the living room and red matching our bedroom), but ultimately decided that it would look weird to have them match only one part of the house. White just seemed to be the most pleasing color.

So, as I was saying, the next day I used up the rest of the primer and then the rest of the semi-gloss paint, putting the first coat (primer) and second coat (first coat of semi-gloss) on the stairs.


They were looking phenomenal, but I knew that putting on one last coat of semi-gloss would just kick them into "perfection." Oh and adding the rest of the trim would really be the icing on the cake. 

This is where the project starts to take forever. There has been about a month between the first coat of semi-gloss and the last coat. Busy lives and the need to get more paint have put the project on hold. I put the pro at procrastination--just like I have procrastinated on writing this post ;)

So, after a visit to our friendly, local hardware store, we were all set to go again! In the meantime, Jonathan used some caulk to hide a few cracks that were forming between the stringers and the treads. That combined with another coat of paint left the stairs looking flawless. 


And here is a little before and after action for ya. 


Well, that concludes the end of a way-too-long post about stairs. And as you can see, this is just part one. Part two will be shared once all of the trim is installed. But, alas, that is another job that the carpenter has to take care of. 

The Pinterest Challenge: Summer '12 Edition

Wednesday, July 11, 2012

Hi everyone! Today I'm linking up with Young House Love and Bower Power for their Pinterest Challenge!!


Now, you may be wondering what "the Pinterest Challenge" is, so I figured I would also include this video. Forewarning, you may just laugh so hard you pee your pants. My favorite is at the end when John says, "Two against one!" bahahaha


Moving on, yesterday they hosted a link up party for the good ol' challenge and I missed it. I had my project complete, but, well, it was someone's two year wedding anniversary.

Yea...priorities people!

So, I'm back today to share my project! As I was selecting a project, I decided to try something that would cost me little to no moolah. You know what happens when you are renovating your entire house right? 

Yea, z-e-r-o money. NADDA.

So, I looked through my Pinterest boards and landed on what, I thought, was a project using Elmer's glue on a painting canvas. This was my inspiration post via Virginia & CharlieOnce I looked at the original source, I realized she actually used puffy paint, not glue, but I decided to try the glue anyways! 


I gathered up my three small canvas' and my Elmer's glue and got to work. 


I had decided that I wanted to use the letter "g" as my "painting" subject. You know, a subtle homage to our last name. So I took a pencil and drew three different gs on my small canvas'. Notice that I messed up on one. I erased it a bit and then realized it would be covered in paint, so it really didn't matter. Once I was satisfied with all of them, I took the glue and followed my pencil lines.


Now, this step was a bit difficult. I imagine using puffy paints would make this process a lot easier, but, like I said, I wanted to use what I had on hand. While outlining the gs, it was really hard to keep the line smooth. Your hands will get tired and you have to go slow enough to let the same amount of glue accumulate as you move along the line. I wasn't striving for perfection, so I didn't worry too much about this. But, if you want a smooth look, I definitely recommend using her original technique.

Once that was done, I let them dry overnight and then took out some acrylic paints I had laying around and mixed up a color that I liked. Then, taking a cheap sponge brush I painted a thin layer of over the whole thing and then used another brush to wipe all the excess off. Basically doing a dry-brush technique.


When I was done with that, I realized that I needed to cover up the edges somehow. I didn't want to paint them because I figured that you would still be able to see the staples. So I decided to use ribbon instead. I bought a basic gray ribbon (make sure to use one the same width as the edge of your canvas) for $2 and then used more glue to adhere it to the edge.


I cut four sections and glued them each individually. I would recommend doing one long piece though. This way you could easily hide a seam in a bottom corner, rather than trying to hide them all around the canvas.

Hey, we learn from our mistakes right?


And, here is the finished product!


I really like them and they seem to offer a bit (ha!) of color to the corner of our living room. My favorite thing is that the carpenter came home and loved them!

You know it must be good if it is husband approved! :)

And here is a cost breakdown for ya: 
      Canvas' : $1.50 x 3 = $4.50 (I had purchased these for another project I never got around to)
      Elmer's Glue: $1.00 (Had this on hand)
      Paint: $2.00 (You only need a little, so just head to wally-world and buy one tube of it)
      Ribbon: $2.00
      Total: $9.50 (This is what it could cost you, but I only spent two big ones)

I would love to hear about the projects that you have tried from Pinterest, so please, leave me a comment with a link to your post!!

A Family Tradition

Monday, July 9, 2012


For The Fourth of July, my side of the family always gets together at my Grandparent's house, which is situated along Lake Erie. For years, this has been the usual thing to do. We bring food, invite a bunch of lovely friends, and enjoy bonfires and personal fireworks displays.  The Fourth will always be my favorite summer event. 

My grandparent's house is situated on one end of a little bay. So, the way that their backyard is set up allows for a perfect view of everything that is going on. You can see all of the bonfires along the beach (each person tries to build the biggest and best), witness multiple fireworks displays as each family tries their hand at a show, and its also fun to see the many groups of people gathering together for one purpose: to celebrate our freedom! 


I love watching the fireworks come off the beach. We used to go to our local fireworks display after spending the early evening with my grandparents, but this is just such a unique tradition, I wouldn't trade it for anything. I love the feeling of community that exists along the lake. Everyone wants to be part of the festivities.


So, my little brother, husband, and I sat along the concrete breakwall and enjoyed the show. The whole time I sat there, I thought about all of the past years and reflected on the joy that such a simple gathering brings.


Do you have any family traditions for the Fourth?